Step-by-Step Instructions to Upload a Photo to Your Portal on a Computer
Follow these simple steps to upload a photo to your secure client portal from your computer.
Each step has a matching screenshot to guide you.
1.
Login to your secure client portal. Then click on "Upload a Document." It is in a blue box. Where to tap is circled in purple in the screenshot.

2.
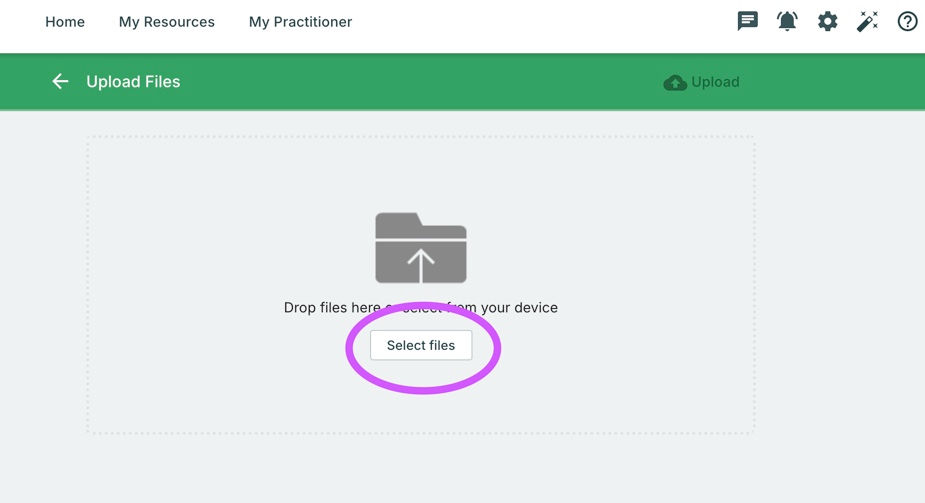
Click on "Select Files."
3.
Browse and select the photo you want to upload from your photo library. Remember that the photo needs to have clear, visible eyes.
4.
Click on "Upload" in upper right corner.

5.
Confirm Upload.

6.
Click on the file name of the photo you just uploaded (we will change the file name).

7.
A menu will populate on the right. Click "Edit."

8.
Rename the file to the name of whomever is in the picture. You can also add notes in the Description field that would be helpful (such as daughter, son, mom, dad, animal breed, etc.).

9.
Click on "Save Changes" on the upper right.

10.
You did it!
